Kits: Install
Congratulations! Now that you’ve assembled your kit, you’re ready to test and install your Botanicalls system.
Connecting Your Leaf
You will need a regular Ethernet cable to connect Botanicalls to your router. Your kit already includes a power adapter. Take the ethernet cable and plug one end into the WIZ811MJ Ethernet adapter, and the other end into your network hub or router. Plug the power supply into an electrical outlet and then insert the barrel plug into the power jack on your Botanicalls board.
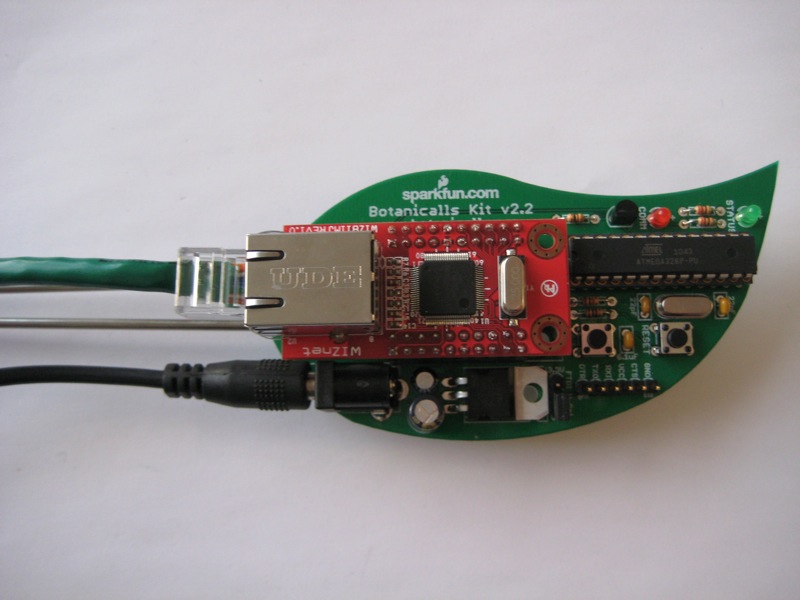
The green and red lights on the XPort will begin blinking immediately. After about ten seconds, the red COMM light on the board will blink several times, followed by the green STATUS light. If this does not happen, don’t panic. Help is available in the Forums.
Testing
Botanicalls comes preconfigured to post to a shared Twitter account: http://twitter.com/botanicallstest that every new Botanicalls can use to ensure it’s working properly. Yours will post with a unique serial number that you’ll see online the first time it’s successful. The tweet will look like this:
Current Moisture: 0% Needs water! [586c7-1]
In the post above, the 58c7 is the unique ID number and the -1 notes that this is the first tweet sent from that Botanicalls unit. (Twitter currently rejects any tweet that is exactly the same as a recent one. so to have different text, numbering them is essential.)
Now it’s time to send your first test message. Press the TEST button once. The COMM light will remain on while your message is being sent. This may take anywhere from 10 seconds to a minute. When the message has been sent the COMM light will go out. (If it blinks a number of times before it goes out the connection failed. Count the blinks and see the Forums for help.)
Let’s check on that test message. Open a web browser and go to http://twitter.com/botanicallstest to see your plant’s tweet. It will probably say that the moisture in 0%, as your Botanicalls unit is not yet installed in your plant. If the tweet has gone through successfully, you’re now ready to install the unit in your plant! (You may also want to customize the Twitter account that your plant posts to. Check the Customize page for information on how to accomplish that.)
Hook Up Your Plant
Insert the moisture probes into the soil about halfway between the edge of the pot and the stem of the plant. Leave at least two inches between the soil and the bottom of the board, so that the plugs are well above the dirt. Make sure the probes aren’t touching each other, otherwise your moisture readings will be incorrect. Plug the Ethernet cable and power in. Long (25ft), very long (100ft), and even ridiculously long (300ft) Ethernet cables are readily available if you need one. If the soil is moist you will see a steady bright green light after start up. If the soil is dry you’ll see a dimmer light that blinks every 10 seconds. Press the TEST button one more time and check your plant’s Twitter page to see the approximate soil moisture. Your leafy pal is now a Botanicalls plant!
New kits are here!

Categories
- Announcements (8)
- Press (5)
Pothos Plant Tweets
Flickr Feed
Meta

This work is licensed under a Creative Commons Attribution-Noncommercial-Share Alike 3.0 United States License.